Friday, 26 June 2015

Experiments with camera

I started off creating a camera and positioned it. Then I go into film gate and used the look through option from the panels. After adjusting the camera position, I created a starting key point to signify the start of the animation.
Creating a camera

Using the look through option

Looking through the camera and creating a starting key point

After setting up all they key points, I used maya software renderer and chose camera in renderable camera so the animation is rendered through the camera
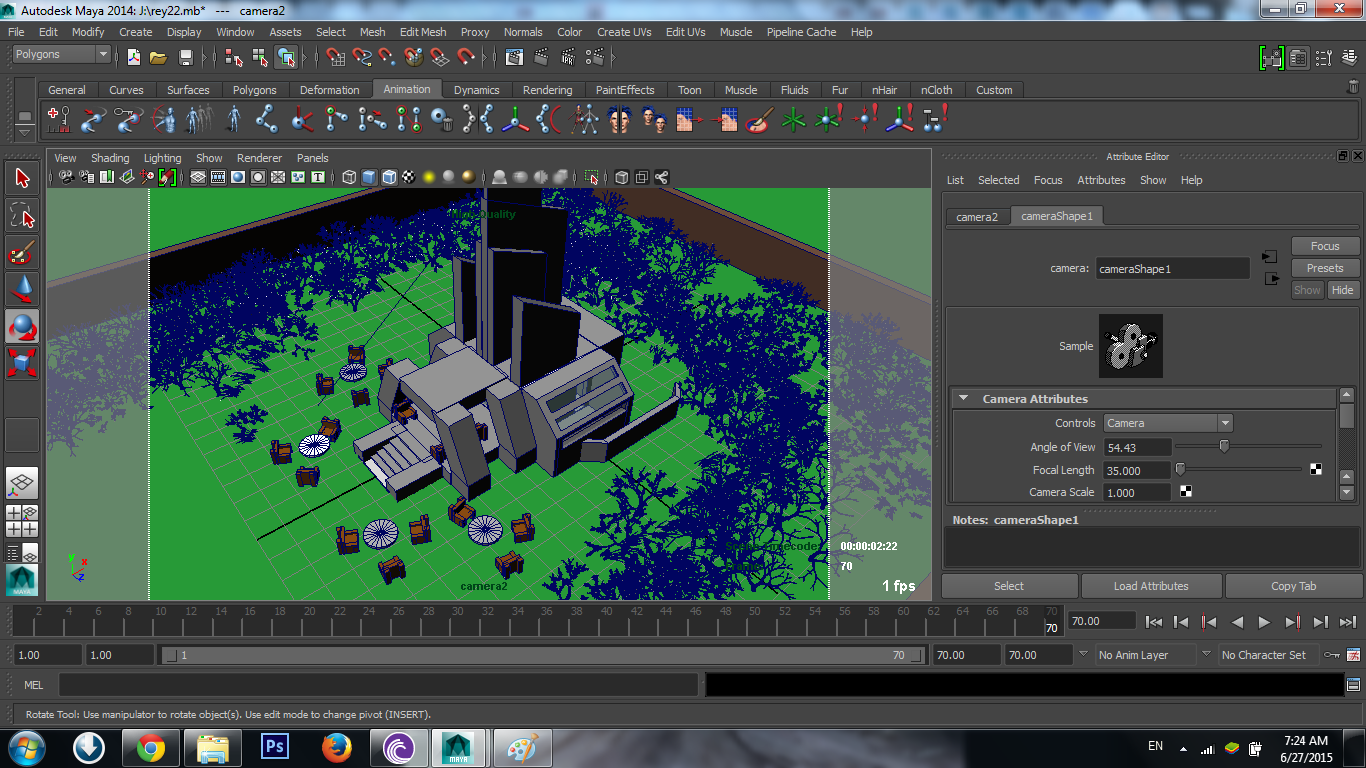
End point of my camera animation

Using camera as the view for rendering

Results of the camera render

This time, I experimented with another type of camera. changing the option to camera and aim. The camera will now only focus on the point that I want it to focus on. I then positioned the focal point at the door of my structure.
camera with camera and aim option

focus on door

Animating from starting point

To the end point

Result of my experiment with Camera and Aim

experiments with lighting

Rendered version of my structure before adding light


Adding an ambient light on top

Result of the rendered version with ambient lighting

Thursday, 25 June 2015

Modeling a car

This model of my car  is using only basic tools and geometry to model.


Started off with basic sketch of my car 


Quick trace using AI

Started off using a cube to model my car

Using extrude and extruding the face to model my car

Using differences I added simple front detail

After that, I added tires using the cylinder polygon and aligned them using the attribute editor

I modeled the top area next using a cube polygon

Using differences tool, I shaped the top part of the car and made mirrors for it.

A simple and almost-finished model of my car

Added simple colors to my car

Animating my Car
First I freeze the transformation then i parent the tires to the car

I then make a key frame on the 1st frame as the start

Then, I selected the last frame and moved the car foward and rotated the tires. After that, I created a key frame on the last frame.

The result of the experiment using software renderer

Sunday, 10 May 2015

Modelling my 3D character


The traced sketches are then inserted into maya.


Starting with a simple cube polygon I shaped my characters body using basic tools like move and scale. I shape them through the polygon's vertex and edges. I also used the split edge tool to shape my model.
simple shape starting by modifying its subdivision to 2

Using scale and move

Using the split tool

I created a sphere polygon next for the head and modified the subdivisions. After aligning the sphere's line with the body I deleted the faces on combined the 2 polygons together. After that, I used the append to polygon tool to combine the polygons together.

Creating sphere for head

Deleting face to combine the object

Using append tool

Combining the polygons

After doing the basic body I started on detailing my model using extrude and basic tools. After detailing, I deleted half of the model and used the duplicate tool to mirror my model.

Making the character's visor

Checking my model in smooth mode

Creating the robot ears of my model

Duplicating my model

Result after duplication

I continued to do the arms and legs of my model using extrude tools
Extruding the legs

Extruding the arms as well as fingers

At this point my model is complete so I combined the two sides and I selected the vertices of my model and clicked on merge: merge vertices. Now I have a no duplicated vertices on my model 
Before merge
After merge

For the final touch I used Assign new material to color my model and gave it a metallic look.
Assigning material

Rendered result


Tuesday, 5 May 2015

Character modelling sketches

In this task, we are to create a character as our 3D model. So, I sketched out a robot which I named server bot. The robot is a robot/server which takes orders and serve food to customers hence the name server bot.

My sketches for the robot 


Tracing in AI


Traced sketch