Showing posts with label Colour and design in 2d and 3d. Show all posts

Saturday, 23 January 2016

Cabinet contruction


Sketches


This week, we plan to build a cabinet for displaying our collected pigments and color test. We are assigned in two groups to work together on the display. So, we sketched some ideas for the display. Then, we gathered some recyclable woods to use. Most of the wood we found are in the workshop at our college. However, the wood has nails at each end and it is hard to get it out. We decided to saw it off instead by measuring the sides of the wood. Creating a small pencil mark we then make small cuts on it as guideline.  It took us some time to saw off the sides of the wood. Do note we do not have much experience as a carpenter so our sawing is more or less flawed. We plan to make a simple cabinet able to fit both of our storage containers. However it requires a total of 7 wood and sawing them off one by one took quite a long time.
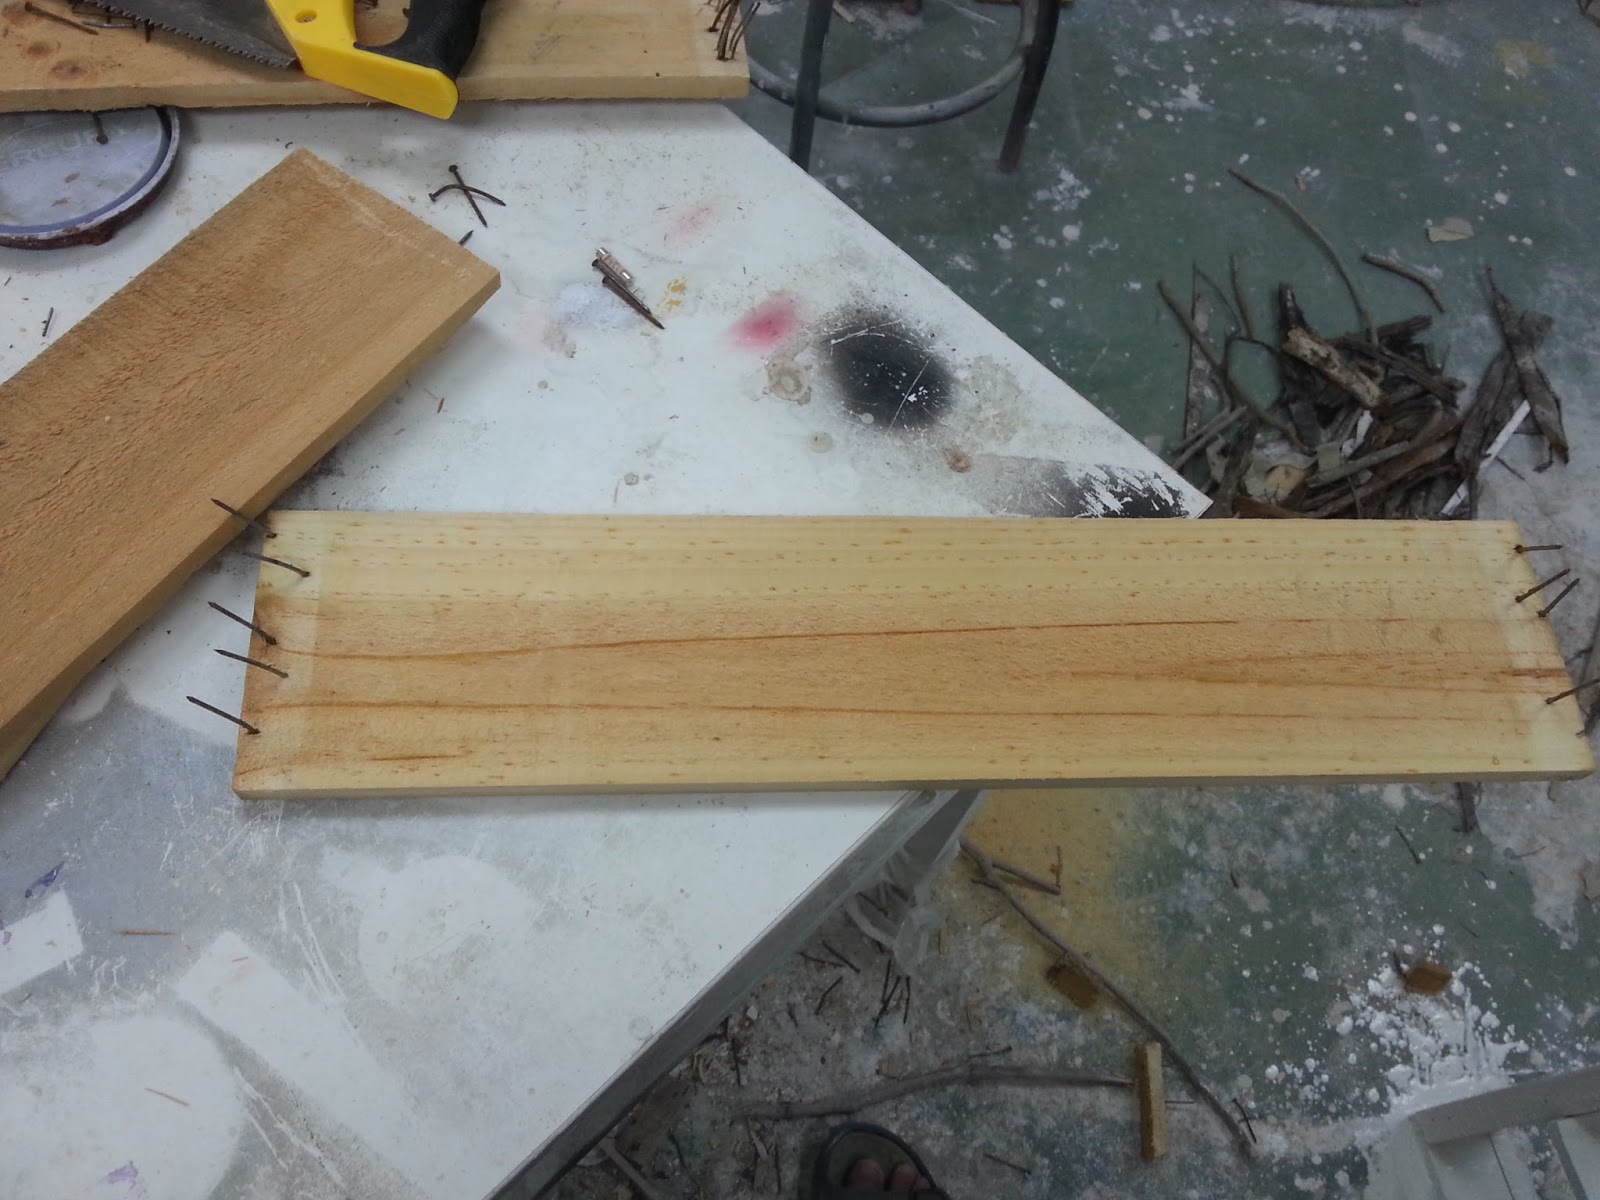

Wood with nails to the side

Guideline on cutting the side of the wood


Done sawing 6, one more to go


After all the wood had been sawed we began nailing the wood together. My partner is a girl however so I had to do the hammering work while she helps put pressure and stabilize the wood. The nails we use are also recycled so it may look rusted but it is still usable. Though, having no skills at carpeting I sometimes made errors when hammering. Sometimes, the wood would go out of place and some nails would be hammered in wrongly. The experience is tiring and took quite sometime to get done. It was a good start for my first experience.

Checking the stability

Hammering the nail


Finally, we finished our cabinet and displayed it outside an empty space with our storage containers and color testing experience. Although, it did not turn out very good as it obviously displayed construction flaws. I am quite happy with it as my first time doing stuff like this and it would serve a good experience in the future.


Full view

Photo of the cabinet

Color display area

Monday, 18 January 2016

Digging for Pigment(Manual work)

Dengkil

This week, we are going to Dengkil to experience digging, finding and gathering of pigments. We parked at a road side of Dengkil. We then take out our tools and boxes to hold the pigment. The day was in the afternoon so it was very hot.

Digging up pigments

Looking for pigment

We started off looking for pigments in our surroundings and theres was alot of pigments just below our feet so we dug those up. After that, we walked around looking for other pigments, smashing and digging to find quality pigments. In order to identify a good pigment, we have to know if the color would stick on our fingers. While searching, Theres alot of sand  and incomplete pigments which are unsuitable at the same time theres alot of good quality pigments that we found.

Chuck of pigment

Sometimes, we dug up various sizes of pigments even as large as the ones in the picture above. Though, most of the colors that we collected ranged from red to orange at this location. There are also different types of color in other parts of the road side but it requires us to cross roads and is quite far. 


A mountain of pigments


Pigment everywhere

As we move along the road, to the location of other colored pigments. We dug up more pigments along the way and tossed it in the drain for later to pick up.We climbed a mountain to discover whitish and purplish pigments and it was filled with a lot of it. The day was also getting extremely hot and it was very hard to climb. We were exhausted while digging for pigments there but we had collected a whole lot of it.

Pigments collected

Filling up the containers

Labled and complete

After the experience, we had launch in a random mamak stall but the food there was expensive. We drove back to Suhu workshop after that and help take out the collected pigments from the trunk of the car. Overall, we had alot of pigments collected in plastics as well as alot of chucks of pigments from Dengkil. Then, we took our containers and filled them with pigments. After filling them up with different colored pigments we then labeled the pigment color and location. The lid is kept open so that water and oil can evaporate. We left it there overnight and went back to our college. It was an interesting and very tiring experience. This also tells me how hard it is for artist in the past gets their colors without advanced technology.

Sunday, 20 December 2015

Color testing

Pajam red

Pajam yellow, sand and Grounded sand


This week we are going to test the color of the pigment we processed. First, we needed to mix the medium for it so we used PVC added with water and mixed them with a mixer. After that, we prepared our pigment as well as some others to mixed with. They are Pajam yellow, sand and grounded sand. The pigment we processed is called Pajam red. We poured a jar of the PVC on a clean plate and put in the pigments we desire then mix them together, we are required to record what we used.


Mixing Pajam red with grounded sand

Result of the mix

My first attempt, was mixing Pajam red with grounded sand. Mixing the color takes some time as the mixture needs to be properly mixed without a trace of pigment. It gets kind of hard to mix  after a while due to the PVC. When ready, I applied it on a cut out piece of canvas, we are free to draw it how ever we like.


Spraying some water

Adding Pajam yellow

Mixing the  add on pigment

Very thick color

Result

On my second attempt, I went a bit overboard by adding water as well as adding the pigment pajam yellow into the mix. The mixture took even longer time, it became so thick and hard to mix, I would though the water to lighten it up but I was very wrong. The result produced a very thick slimy goo.


Pajam red + yellow

Pajam red + yellow + water

After that, I decided to clean up the color to make a new one. We had to clean up the color inside a bucket because the color is very strong and could taint everything it touches. We had to wash it within the bucket and throw the water outside on dirt and nowhere else. This time, I went simple by adding Pajam red and yellow  drawing the result then adding water to the mix. The mixture this time is lighter with the water however and it produced watery colors. Finally, we listed what we used in each canvas using a small sticker and left it to dry for next week.


Manual work (Swilling the pigment)

In this week, we are going to experience swilling the raw pigment for the pure one. The lecturer just told us, that this is just raw pigment and it will not be used for color testing. The pure pigments is the one that we will use for color testing.

Swilling equipment

Raw pigment produced

Cleaning up the grinder

Cleaning up the boxes

 Storing them into plastic bags

Plastic bags are labeled

When we arrived at the workshop, there was a good amount of pigment processed but the lecturer told us that this pigment was not final and requires swilling to separate them from the larger rocks.
Of course we had to clean up the equipment we had used, we also had to help store the sand for later use. After cleaning, The swilling needs to be taken place in the toilet as it will become dusty and to keep the studio clean. We are also required to wear masks as the dusts of the pigments will float on air. We also took our turns doing this, and each of us took a very long time.


The Toilet work space

Swilling

Produced Pure pigment


Swilling is a very tiring process, we are to shake the swill up down left right in order to get the pure pigment. For an hour or more , I have swiveled and only produced a small amount of it. It is also very hard to see if the pigments are falling because they are so small, the only way to know is to tip the obtained pigment to one side and swivel to observe signs of the pure pigment. After my turn, my face was covered in red pigment and it was indeed strong. Some of my peers even got it on there cloths and shoes too. After the swilling process, out of the bag of raw pigment we had produced a half of the jar of pure pigment and ready to be used for color testing next week.

Manual work ( Smashing the rocks)


This week in Suhu's Studio, me and my peers are going to experience smashing the rocks for its pigment. Cleanness and neatness is a must in our lecturers studio, so he laid out a mat/cloth for us to work in so the rocks doesn't dirty the floor. We will be using red rocks to obtain red pigment.


The rocks that are used to obtains its pigment

Work space

Pigment of the rocks

Smashing the rocks to bits

First, we have to identify the rocks surface, any other color other than red are to chipped away so it will not ruin the color .In my case, the rocks surface contains blackish and yellowish surface, black is considered fine as long theres red in it, the yellow however are to be removed. Using a hammer and a rock solid mold. We identified, chipped and placed the rocks into the mold, ready to be smashed. We took turns smashing the rock, the process is indeed tiring as the rocks are not easily shattered to small pieces easily and requires a lot of force. Smashing the pigment to tiny pieces takes almost 10 - 20 minutes each round. So, we mostly do about 2 rounds before tiring ourselves and switching turns. It was indeed a tiring and time consuming process. It makes me wonder how artist in the past endure this process without technology for years.

Scooping the pigment

Into the grinder

Grinder placed on top the roller

Hours pass, we finally finish smashing the rocks and we were all tired. On our final step, we scooped the pigment into the grinder to be processed further. We tighten the cover of the grinder and placed it on top of the roller. As we turn on the roller, the sounds of the rocks smashing was heard and it was really loud. Our lecturer told us, as the rocks are smashing the sound would gradually decrease as the pigment is bring processed. So, to end our day we left the grinder running for an estimate of 32 hours and the next week we would experience swilling the pigment. 


The process of obtaining pigment

This week in Suhus Workshop, we learn about pigments and the process of processing the pigment. Pigments are colors obtained from natural sources they are easily obtained from rocks and plants with specific colors. In my case, I would have to get the pigments from rocks that was gathered naturally.


Raw rocks

The smashing mold  and a bucket of sand


The pigment grinder

The roller

Now, in order to get the pigment from the rocks we would have to smash the rocks as small as possible. Once smashed, the pigments are then required to be smashed even smaller using the pigment grinder. The grinder consist of numerous rocks which looks soft but are actually very hard, most of them are small to medium sized but there some large ones. There is also the roller to that the grinder would be placed on. The roller would roll the grinder causing the rocks inside the grinder to smash together and the pigment to smaller bits. This process takes hours and even days, the longer the day the finer the pigment.


Sand is used to clean the grinder


However, after processing the wanted pigment the grinders insides would become the color of the pigment which requires cleaning in order to use it to process another pigment. Sand is used to clean up the interior of the grinder as it would return the grinders interior color to the original while the sand absorbs the pigments color. This process also takes hours depending on the pigments color.


Rocks in a jar

Pigment in a jar

Cabinet left


Cabinet right

Also, It is required to have a cabinet to store the pigment and the sources of the pigment which is the rocks of the pigment. Each of the rocks and pigment is stored in a clear jar so you can see the colors clearly. It is better to label those jars with the locations that the rocks are obtained so it serve as a reference to where the rocks are found as well as gathering more of it. This is just a lecture overview from my lecturer,  we are required to do all the manual work in the next week. So, I am looking forward to experience the process in the following week.